
Setup guide for the Ketch Consent Tag module
This public guide covers how to install, configure, and use the Ketch Consent Tag HubSpot CMS module.
Third-party account required. The use of this module requires a Ketch account. If you do not have one yet, sign up at app.ketch.com. You should also install the Ketch HubSpot app so your portal can store the Ketch JavaScript URL.
What the module does
Ketch Consent Tag is a global HubSpot CMS module. Add it once and it injects your portal’s Ketch consent script on website pages, landing pages, and blog content.
- Loads the Ketch boot script saved for your HubSpot portal (no hardcoded script in the theme).
- Adds a “Your privacy choices” link so visitors can reopen the Ketch preference center.
- For California visitors, the link label can update to “Do Not Sell My Personal Information”.
- Works with any HubSpot theme. In the editor you see a placeholder labeled Ketch Tag.
Prerequisites
- A HubSpot account with permission to add Marketplace modules and edit CMS pages.
- A Ketch account. Sign up here if you do not have one, then create or select a web property and copy the Ketch JavaScript (boot script) URL. It is typically
https://global.ketchcdn.com/.../boot.js. - The Ketch HubSpot app installed, with that JS URL saved on the post-install setup page.
How to install the module
- In HubSpot, go to the Template Marketplace and find Ketch Consent Tag (the listing name matches the module label).
- Click Get module (or Install) and add it to your HubSpot account.
- Confirm it appears in the page editor module list as Ketch Consent Tag.
The module is available on site pages, landing pages, blog posts, and blog listing pages.
How to configure the module
1. Save your Ketch JavaScript URL in the Ketch app
- After installing the Ketch app, open https://hs.ketchd.net/instructions.
- Paste your Ketch boot script URL into Ketch JS URL and click Save JS link. Only HTTPS URLs are allowed.
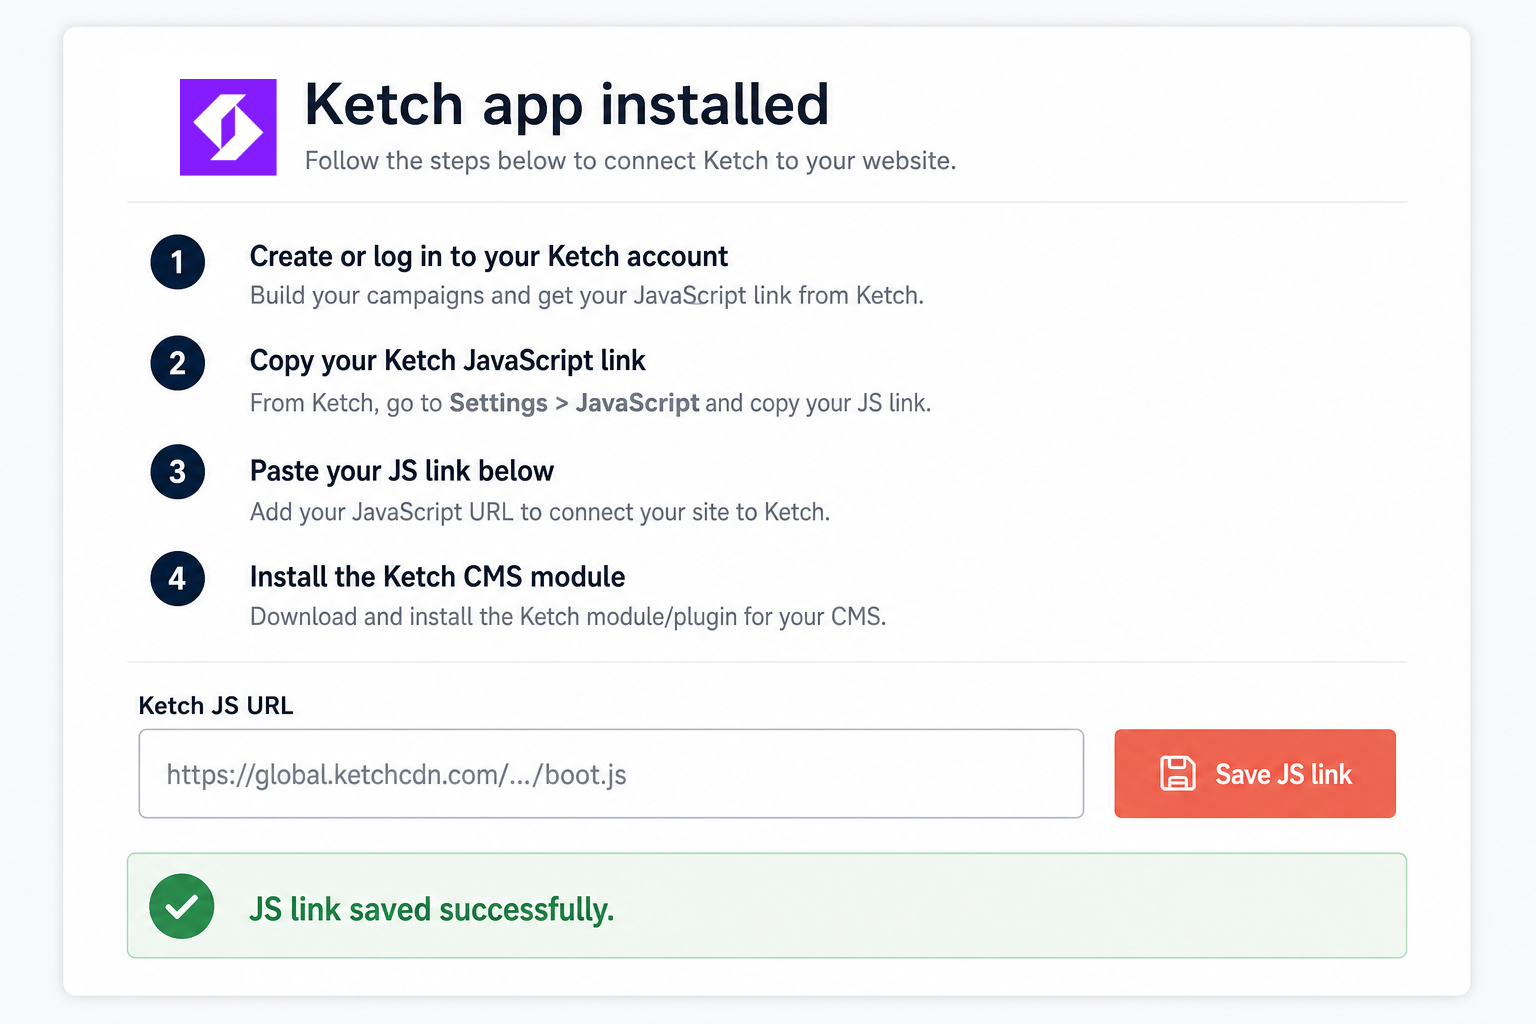
2. Add the module to a page
- Go to Content → Website → Website Pages (or Landing Pages / Blog).
- Open the page where consent should run (often Home, or a global header/footer).
- In the editor, drag Ketch Consent Tag into the header or footer. Because it is a global module, one placement can apply across the site depending on how your template is built.
- Publish or update the page.
3. Module field
Select the module in the editor. The Content tab includes:
| Field | What it does | Default |
|---|---|---|
| Settings API Base URL | Backend that serves GET /public/js-link?hub_id=<portal_id> for this portal. Leave the default unless Ketch support gives you a different URL. |
https://hs.ketchd.net |
Inline help in the editor: the module requires a Ketch account, the Settings API Base URL, and a JS link saved in the Ketch app after install.
In the page editor
You will see a dashed placeholder: Ketch Tag (v1.1.2). The live consent banner appears on the published page, not in the editor canvas.
How to use the module
Automated
- On the published page, the module requests
https://hs.ketchd.net/public/js-link?hub_id=YOUR_PORTAL_ID. - If a JS URL is saved for that portal, the Ketch boot script is injected in the page
<head>. - A “Your privacy choices” link is added so visitors can open the Ketch experience (
showExperience). - If Ketch reports region
US-CA, the link text becomes “Do Not Sell My Personal Information”.
Manual
- Change the saved JS URL in the Ketch app setup page; you do not need to edit the module on every page.
- Change Settings API Base URL only if directed by Ketch support.
- Remove the module from the page if you no longer want the tag on that template.
A video walkthrough is available:

How to remove the module
- Open the page or global group where Ketch Consent Tag was added.
- Select the module and delete it, then publish.
- To stop using it account-wide, you can also remove the Marketplace module from your Design Manager assets if HubSpot provides that option for your account.
Removing the module stops injecting the Ketch script on those pages. It does not uninstall the Ketch HubSpot app, delete the Ketch Consent contact property, or delete the JS URL saved for your portal. See the app data consequences for CRM impact.
Support
- Email: support@ketch.com
- Web: https://ketch.com/support
- Phone: +1 415 737 6489
- Related app guide: Ketch HubSpot app setup
This page is the live setup documentation for the Ketch Consent Tag